Here is described the way how I make fiberglass parts. You will not find it written like this in any other book or article. This method is simple and easy, it does not require any special or fancy tools, skills or materials, anybody who is capable enough to build an airplane should be able to follow it and make his own custom fiberglass components like cowlings and fairings.
The page is not the best it can be yet, so far the two projects described here were actually made a long time ago, back when I didn't have a website, didn't even have a computer and digital camera and I wasn't trying to document the process and didn't take the right pics. I have all of it now so from now on the future projects will be much better documented.
In order to be able to make that fiberglass part you have to construct a model of the part first. This model (called a "plug" in the fiberglass industry) must be made as accurate as possible with the thickness of the finished fiberglass lay up counted into the dimensions so any altering and filling of the laid up part is minimized. Since the plug is made out of foam, It's far easier to shape then fiberglass or body filler so take a great care to do a good job on the shape of the plug and you will eliminate a lot of work later.
The foam used is the ordinary insulating kind from Home depot. It comes in different thickness and you will need to glue it up to get the needed block size. Don't look at the necessity of gluing the foam sheets only as a nuisance, this glued up block has a very big advantage. When you shape your part, the glue lines serve as a guide to see how smooth your contours are and also the left to right symmetry can be seen easily without using templates. It works like magic.
To glue the foam sheets together use the "3M super 77 spray adhesive". It's the only glue I know of that will work on this. You can get it from Home Depot or hardware stores but don't mix it up with the similar looking "3M high strength spray adhesive " which will not work. Before gluing sand the surface of the foam with a large flat sanding block. This does two things, the surface of the foam has sort of harder skin like properties. This inconsistency in the material would cause raised ridges and wobbly surface when you're sanding it to shape. The other reason is the surface to be glued must be perfectly flat. The contact adhesive is just that, it has absolutely no gap filling capability, it holds on contact so if there isn't any the foam will be creeping apart and falling to pieces when you work on it.
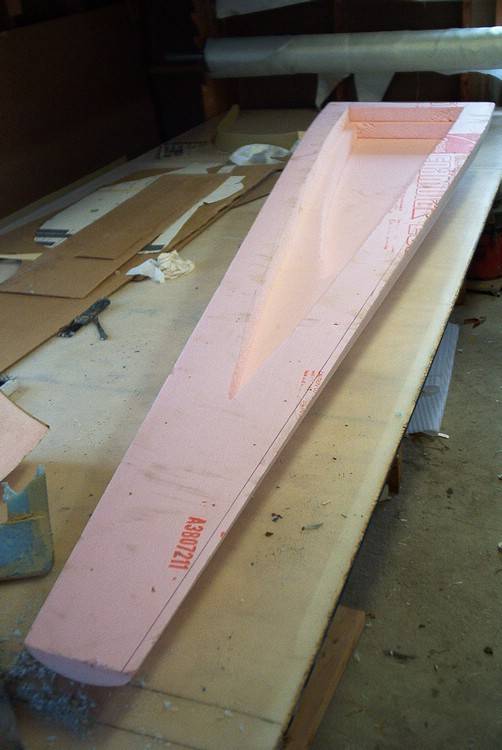
Depending on the part the foam may be stacked horizontally, vertically, or a combination of the two. Sometimes if exact shape of the profile of the part at a certain plane (or a side) is known, a thin plywood template can be made and glued between the foam sheets into the exact position (or a side) and the foam is then simply shaped down to the template. In some cases a part of the plug can be cut out by a hot wire to a certain shape or an angle following straight edges or Formica templates of desired shape temporarily attached by nails.
The rough shaping of the foam is done by a large steak knife by shaving it off in thin slices. Keep it very sharp so it doesn't tear the foam and be careful not to stab yourself. The surform file also works well for rough shaping and contouring. Sand to the final shape using proper sanding blocks, go to the Finishing a composite airplane page and read all about sanding , it all applies here the same.
You may have read in other books and articles directions how to finish the surface of a plug using plaster or epoxy fillers primers and lacquers to prevent sticking of the fiberglass part to the plug and enable the successful separation of the two. None of this finishing is necessary , all you need to do is apply the 2 inch plastic packaging tape neatly all over the foam plug and wax it. Epoxy resin does not stick to this plastic at all and the finished part will release with ease. The tape will bridge all the small nicks and smooth out the minor surface imperfections.
Fiberglass cloth to make the part can be purchased in many different weave styles which have different weight thickness and working characteristic but there are only several that are commonly used that I will describe here. Probably the most basic style is "7500" also commonly called boat and tooling cloth. This cloth weighs about 10oz./sq.yd, .14" thickness, has plain fairly open weave which allows easy wetting out and fairly good contouring. The yarn in this cloth is twisted which gives it higher thickness for faster build up. The disadvantage of this cloth is that surface of the part is left very rough requiring more sanding and finishing work so its better not to use it as a last ply in the lay up.
Second common style is 7781, a little lighter and thinner then 7500 at about 9oz./sq.yd, .009" thickness, this cloth has very tight weave so its harder to get the air bubbles out and it does not go well around compound curves. It's a good choice for flat or single curved parts, the finished lay-up is left very smooth requiring only very little filling and finishing.
The third style is RA7725BID also known as Rutan cloth, about 10oz./sq.yd, .12" thickness, this cloth has moderately tight crowfoot weave which enables it to go very well around compound curves but the disadvantage of that is that the fibers get easily disturbed and out of position and the edges tend to unravel and fall apart so it must be handled very carefully at all times.
The last one is 1522, this is very light weight and tight weave cloth 3.6oz./sq.yd, .0055" thickness, good as the last ply on the lay-up to smooth out the surface.
Most common parts like cowlings, wingtips, fairings and moldings will require two to four plies using one, or a combination of, the first three types described above. The resin used is epoxy, I use Aeropoxy on almost all of my parts, but other epoxies can be used as well. I do not use and do not recommend the use of polyester resins.
The lay-up . Before you start the lay-up, precut all the cloth and stack it in reverse order so you have it ready and know which piece goes where. As you start the cutting, try to form the dry cloth onto the plug to determine what is the best yarn orientation that enables the cloth to stretch and form to the plug without creases, folds or cuts. Also see how the dimensions of the cloth change.
The lay-up technique depends on the size and the shape of the part. Sometime its better to position all of the cloth dry over the plug and then wet out all the plies at once, sometime its better to put it on one ply at a time. To wet out the cloth, a squeegee, a brush or a small paint roller can be used, one tool will work better then another depending on the size and the shape of the part.
Finishing of the part will depend on how good a job you made on the construction of the plug and how good finish you want. For a perfect finish you can follow the directions on Finishing a composite airplane page. If you have a fabric covered airplane some fiberglass parts can be finished with fabric as well.
| The Engine Cowling |
 | This is how I made my cowling. I used open cell Styrofoam on this plug because I had left over chunks of it and it turned out to be not a good idea. The open cell structure doesn't give any surface area and the release tape doesn't hold on to it so I had to put a thin coat of epoxy/micro filler on it so the tape sticks. |
 | There are two ways you can go about this. You can tape it up right on the plane and make that cowl lay-up on it, or you can remove the plug from the plane and add extra 2 inches of foam to the edges to extend the parts that will go over the fuselage. It's more work on the plug this way but easier to make the lay-up because you can rotate the plug any way you want when laying up on it and you don't have to worry about messing up the airplane with resin while you're doing it. |
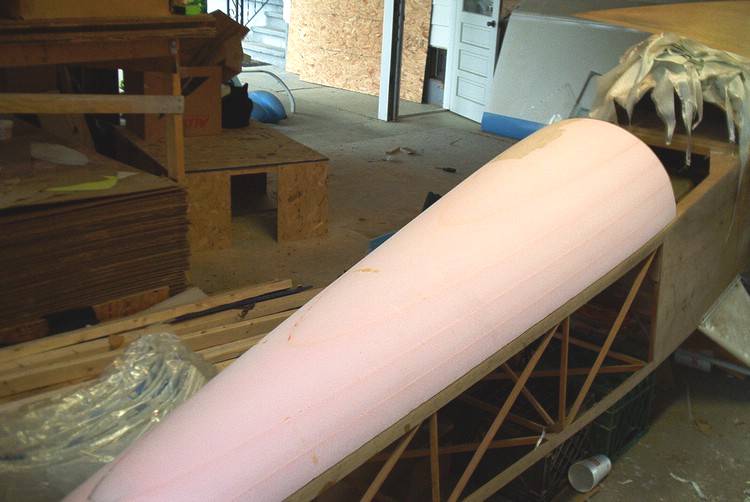
 | I chose to do the lay-up not on the plane. This is the back side shot of the cowl plug, all the extra foam on edges for the overlaps is already in. |
| Turtle deck, Headrest |
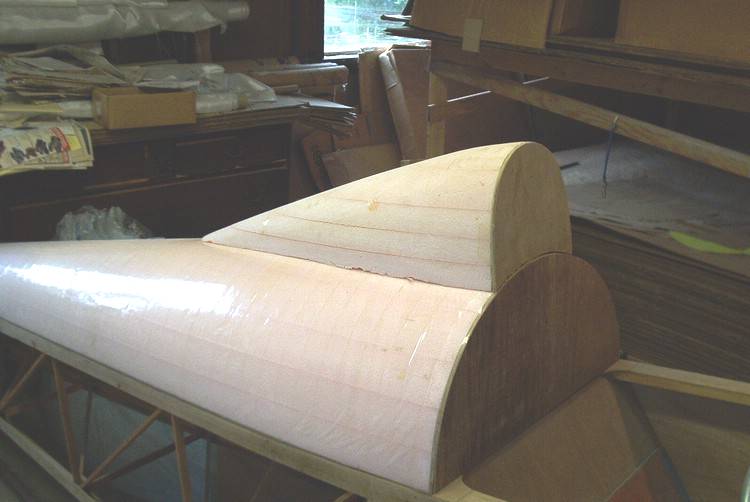
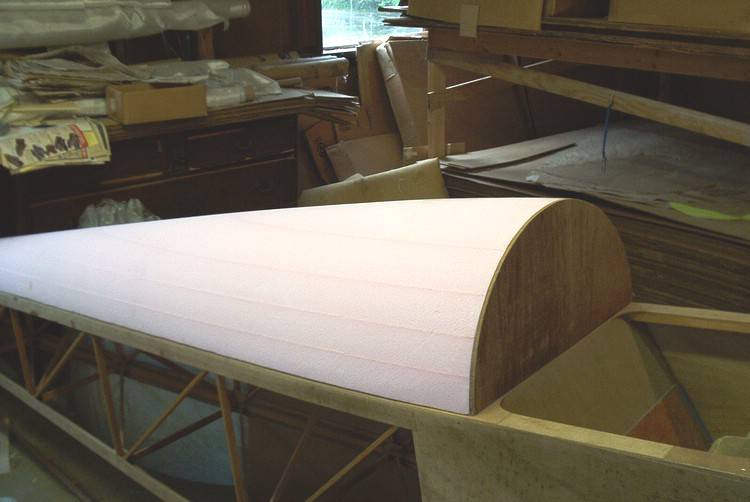 | This is the finished turtle deck plug, The front face has a plywood template glued to it. |
 | Note those glue lines, they serve as a guide while you shape the part. If the part is wavy so will be the lines and you can see it. |
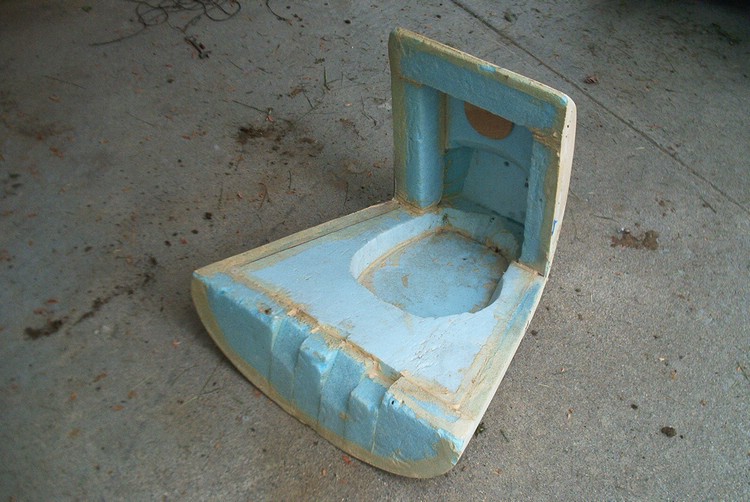
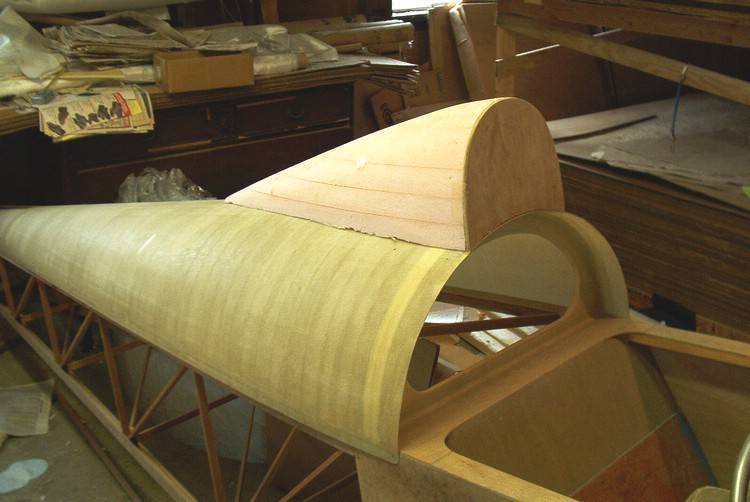
 | Here is the look to the inside, those cut out pieces from the two bottom sheets were reused on the top where much smaller pieces were needed. |
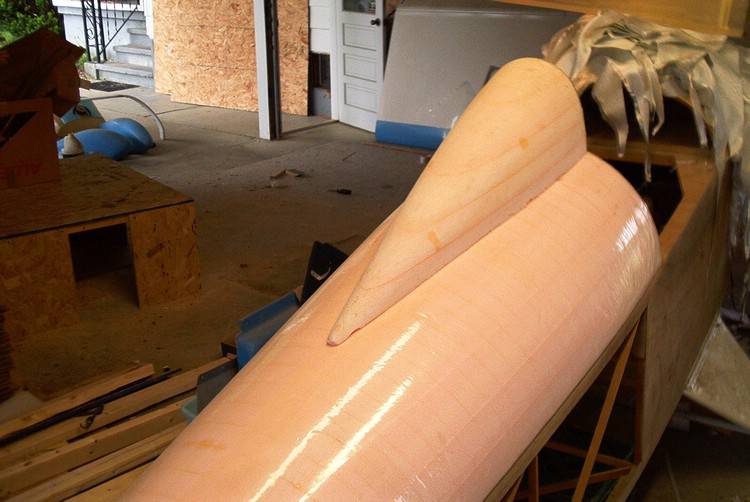
 | The plastic release tape has been applied. The head rest plug is also finished, it's a lot easier to make these two as separate parts rather then all in one piece. |
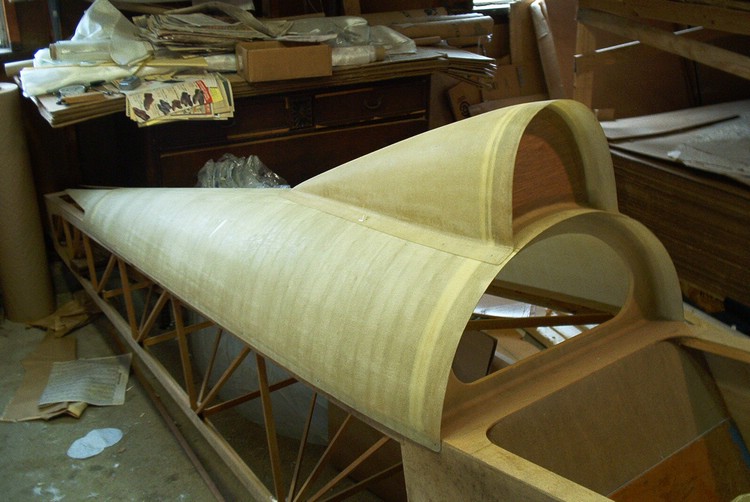
 | The turtle deck lay-up was made right on the plane going over the sides of the fuselage where the deck is mounted with small screws. |
 | Here the reinforcing ribs are laminated in, there will be one more rib closer to the front end but it will not be put in until the airplane is completed, CG checked and location of the chute determined to get the best CG balance. |
 | Another reason why the headrest is a separate part is that this one is made fairly long for open cockpit version. The plan is to install a bubble canopy in the future for which another much shorter headrest will have to be made. |
 | The headrest laid-up, you can't get any better fit of that flange as when you lay-up one part on top of the other. |
 |
The reinforcing rib is glued into the headrest, a little more sanding, priming to get it ready for the paint is all that's left to do. These parts could be also finished by covering them with fabric just like the rest of the plane. |
| Windshield molding |
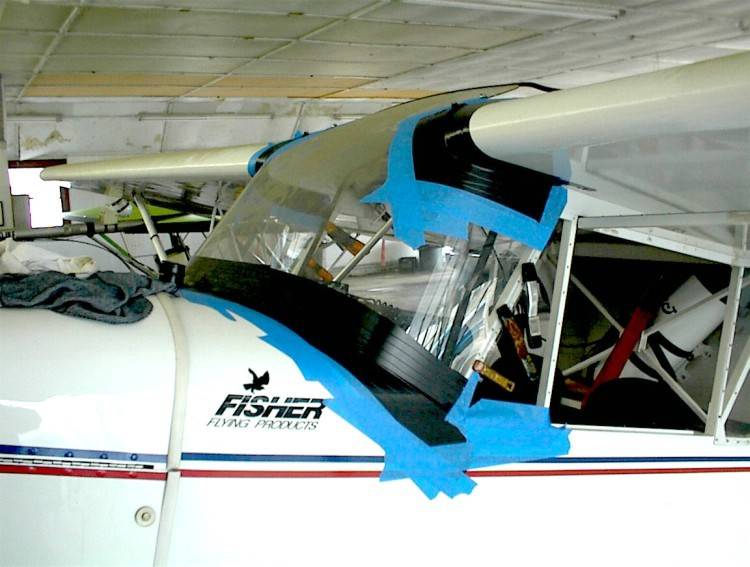 | Here is something almost every plane needs and it never comes with the kit. Its that molding around the windshield and/or rear window. These moldings hold the windshield much better then the usually prescribed metal clips and give mush beter looking profesional finish. Here we are making one for Tabor's Koala. The black stuff it electrical tape, it works real well for masking the area where the actual lay-up will be made because its very pliable and molds around compound curves. |
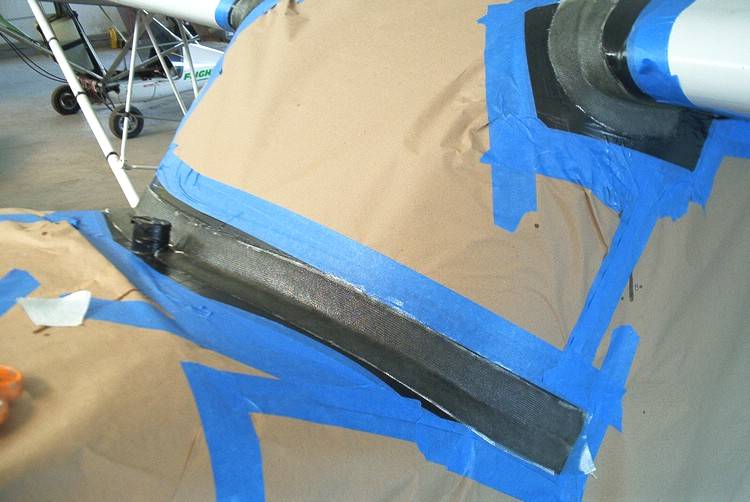 |
We used paper to mask the rest of the airplane. That was not the best choice, epoxy resin will soak right through the paper, you need to use waxed paper or some kind of plastic sheet The glass tape for this lay-up must be cut on bias (at 45 degrees to the orientation of the weave). Otherwise you would not be able to mold it into a curve. |
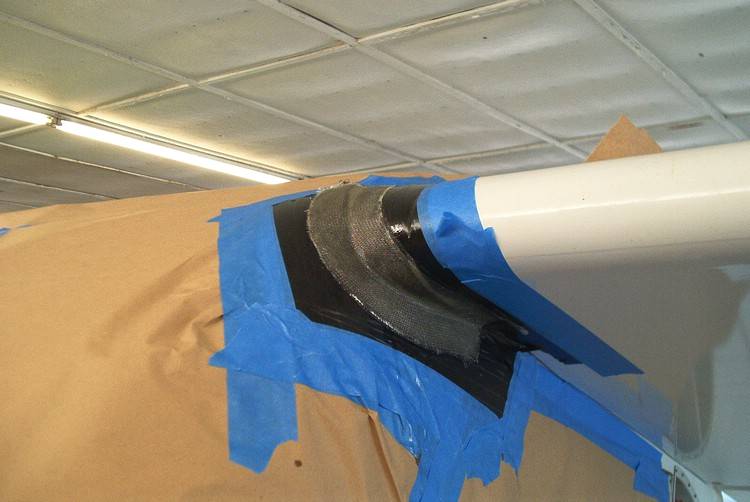 |
This part of the windshield is prone to cracking, These moldings will fasten the windshield better and help to eliminate the problem.
This project is still ongoing, I will post the pics of the finished parts and installation when we have it done. |
 | 06-05-03, More progress today, The lay-up cured for two days so we pulled it off and started the trimming and finishing process. |
 | Regular tin snips are used to trim and cut off the excess , four plies is about as much you can reasonably cut with this tool, if the laminate is any thicker than that you have to resort to a jig saw, band saw, or a cut off grinder. |
 | 6-15-03, Final pic of the finished and installed moldings |
| Access panels |
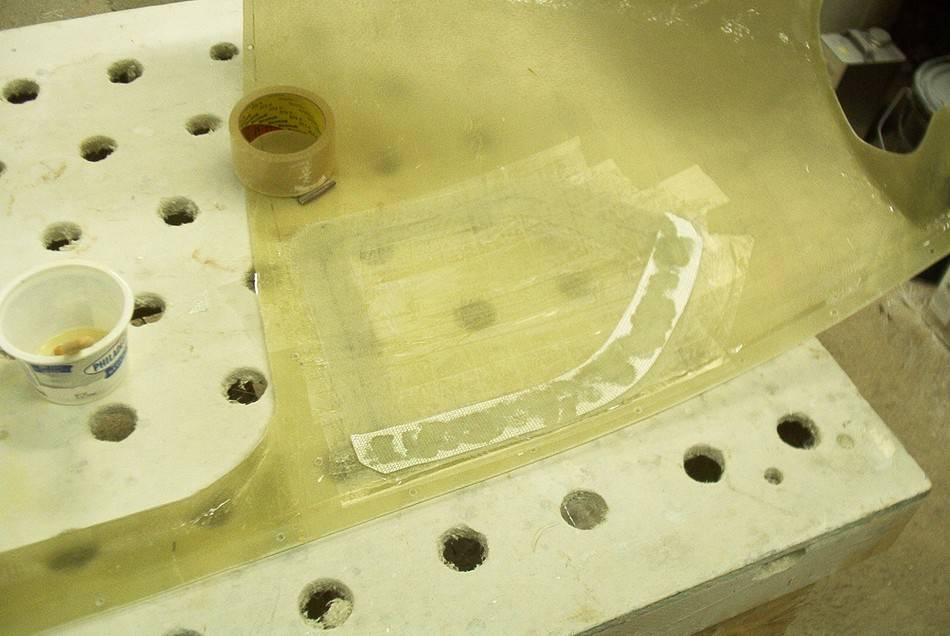 | Most large parts require some access openings. The usual written instructions call for cutting the opening then taping the cover back in place and then build up the flange. That's doing it backwards, Its better to make the flange first. Sand the inside area surface smooth, mark the cut out, apply clear packaging tape as release ply, Make a flange lay up. Take a note, If the opening you are making weakens the structure the flange acts as a reinforcing doubler around the hole so here is the opportunity to chose the width and thickness of the flange as needed. |
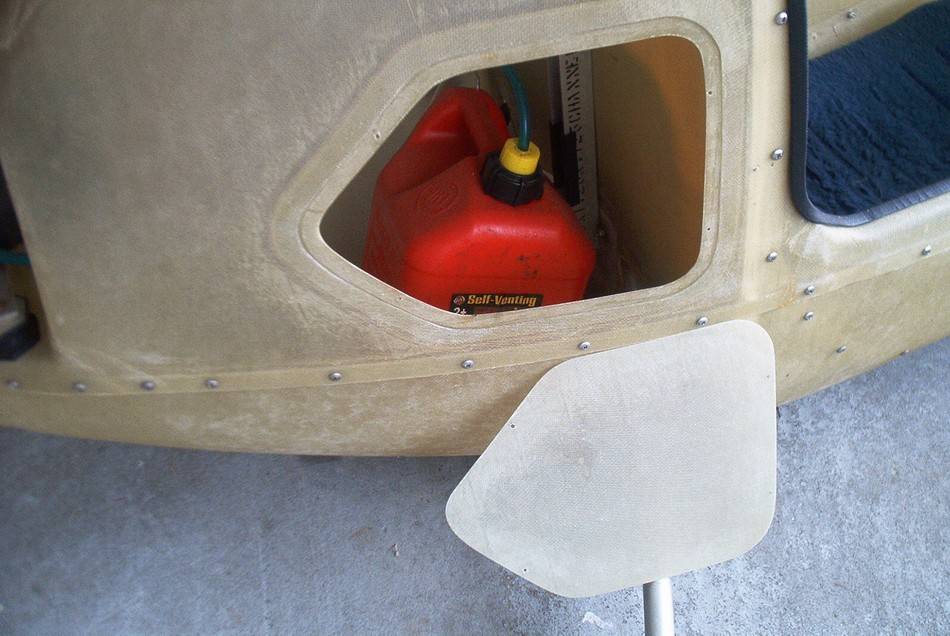 | When the flange cures remove it, cut out the cover panel, be careful on this because if your cut is rough by the time you smooth it out on both sides the gap becomes big, Trim the flange as needed and bond it back in place. Make sure you scrape the excess glue that oozes into the recessed surface before it cures. |